Click the Allocations
menu link located at the menu bar to open the Allocate Labor screen.

If applicable, select a location from the Location drop-down list.
Select an organization from the Organization drop-down list.
If applicable, select a labor group from the Group drop-down list.
Enter a timesheet date into the Date text box. Alternatively, select a date from the calendar. (see also Date Format)
Select a labor resource from the Resources list box.
Select an order type from the Order Type drop-down list.
Enter the cost object information into the appropriate text boxes.
From the Premium Rate Adders area, click the ST
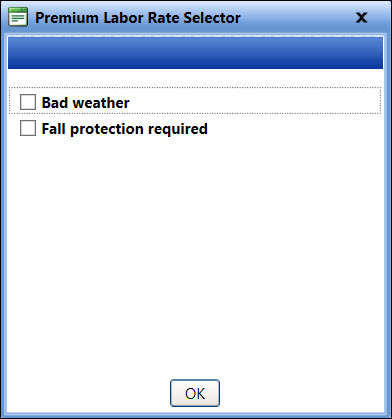
button to open the Premium Labor Rate Selector dialog box.

From the Premium Labor Rate Selector dialog box, select one or more conditions by clicking the appropriate checkboxes.
Click the OK button
to apply the conditions and close the Premium Labor Rate Selector
dialog box. The selected premium labor rates are applied to the straight
time rate.

If applicable, repeat the steps to apply conditions for OT, DT, R4, R5, and/or R6.
Enter the available straight time, overtime, double-time, rate 4, rate 5, and/or rate 6 into the appropriate text boxes.
If applicable, enter, select, or edit other information such as extra charges, area, or GL account.
Once completed, click the Submit button to allocate and display the allocations of the selected labor resource in the grid.